Advanced KYC
Implementation guide for Advanced KYC.
This doc has been updated with Priority specifications.
Do I have to use Advanced KYC? If I'm an existing customer using Classic KYC, do I need to switch?
NO, if you are switching to our new banking partner, Priority, you are not required to switch.
We are requiring newly onboarding customers to use Advanced rather than Classic KYC.
While there is no current ETA, we do plan to eventually sunset the Classic system and only support Advanced KYC.
Building out Advanced KYC
This section is for onboarding customers who have not already built out Classic KYC. Jump to this section if you have already built out Classic KYC and are switching to Advanced.
Please note that the Advanced KYC system is NOT SDK compatible.
Endpoint Order
To ensure the user_handle you're wanting to assign is unique.
Creates a new individual or business entity in the Sila ecosystem with associated PII. Does NOT begin KYC verification.
NOTE: Prior to beginning KYC verification in the next step with /request_kyc, end users can update their information with /update.
Kicks off KYC verification for a specific user_handle. Note this cannot be called until you have created a KYC Flow in the console.
Creates the Sila wallet / remote Priority ledger account (is created upon successful /kyc call, not dependent on KYC status). If you are using an app that uses JWT authentication that the remote ledger account will be frozen until KYC is passed. If you are using ECDSA authentication, the payment instrument will not be frozen, but you will not be able to transact with it until KYC is passed.
/get_verifications/<verification_uuid> or /get_verifications
Return the verification status of a single KYC application with /get_verifications/<verification_uuid> or a full list of all verification records for a specific user_handle with /get_verifications.
Please do not:
- Do not poll /get_verifications or /get_verifications/<verification_uuid>
Just like how we advise against polling /check_kyc and using webhooks instead, please use our webooks instead of polling these endpoints.
Sila reserves the right to impose rate limits if deemed necessary.
- Do not reveal the returned
tagsorreasonsto your end users.
Upload end user documentation to this endpoint if necessary to verify their identity. Use the reasons provided by /get_verifications/<verification_uuid> to determine the type of doc to upload.
Handling and Testing documents_required
documents_requiredSometimes providing documents is required for passing an entity successfully through KYC.
- Use the
reasonsprovided by /get_verifications/<verification_uuid> to determine the type of doc to upload, then use /documents to upload any necessary docs. Make sure to provide theverification_uuidin the /documents call so it is uploaded for the correct verification record on the correct entity. - Not a requirement, but you may consider reviewing the PII provided for the entity during /register and updating anything that may be incorrect.
- If the doc is incomplete in some way, such as missing a signature, you will be prompted to upload the doc again.
- If the doc provided does not provide enough further verification to pass KYC, you will be prompted to upload a different doc.
- There is an estimate of an approximately 24 hour turnaround time for reviewing uploaded docs.
- There is NOT a limit on the number of times the same or different docs can be uploaded for a single verification record.
EXPIRED VERIFICATIONS
- If a verification record goes to
documents_requiredand documents are not uploaded within 30 days, that verification record will automatically fail.- You can confirm the failure is due to expiration by checking for
LEAD TIME EXPIREDreturned as a reason by /get_verification/verification_uuid. - If you have an end user in this scenario, proceed by calling /kyc again. This will create a new verification record with a new verification_uuid to upload docs to. The original record will remain in
failed.
- You can confirm the failure is due to expiration by checking for
Triggering documents_required
documents_requiredIn SANDBOX ONLY, you can intentionally trigger a documents_required status by providing specific name values when registering a new entity.
In Sandbox, the entity will automatically pass KYC from this state after about 5 minutes.
NOTE: Values are case sensitive.
| Entity | name values |
|---|---|
| Individual | first_name: INDlast_name: CVI 10 |
| Business Only the business ends up with documents_required. Linked members will pass. | entity_name: BUS BVI 10 |
| Individual that is the member of a business Both the business and the members with the trigger will end up with documents_required. | first_name: BOlast_name: CVI 10Provide for individual member registration. Business BUS BVI 10 trigger does not need to be specified for parent business entity. |
Webhooks
- Fires on the transition between pass/fail. Rely on kyc_action for all updates in between.
- Not applicable to Classic KYC system.
- Fires on documents_required updates or review. Rely on kyc_status for pass/fail update.
- Not applicable to Classic KYC system.
KYB
See our KYB docs for more.
- Link business members to the business entity while they are all still unverified, then run /kyc on only the business entity to pass all entities through the KYC process.
- After a business has passed KYC, if there is a change in business members and you need to add a new one you can link that member before or after they have passed KYC, but you should run KYC on just that individual entity rather than re-running the business through KYB.
- In this scenario, if you are linking a new member that has not yet passed KYC, /link_business_member will kick off the verification process - no need to call /kyc. The verification_uuid will be returned in the /link_business_member response.
Basic KYB Order
- Register business entity and all individual entities to be linked to the business as business members.
- Link individual entities to the business entity with /link_business_member.
- Run /kyc on the business entity - this will also run KYC on the individual entities.
- Once all entities have passed KYC, certify beneficial owners and business if necessary with /certify_beneficial_owner and /certify_business.
Console Setup Requirements
With Advanced KYC, you will create your own KYC Flows in the Console to be submitted to our Compliance team for approval. You are required to have one for KYC, but if you use KYB you will need two Flows - one for KYC and one for KYB.
Creating a New KYC Flow
-
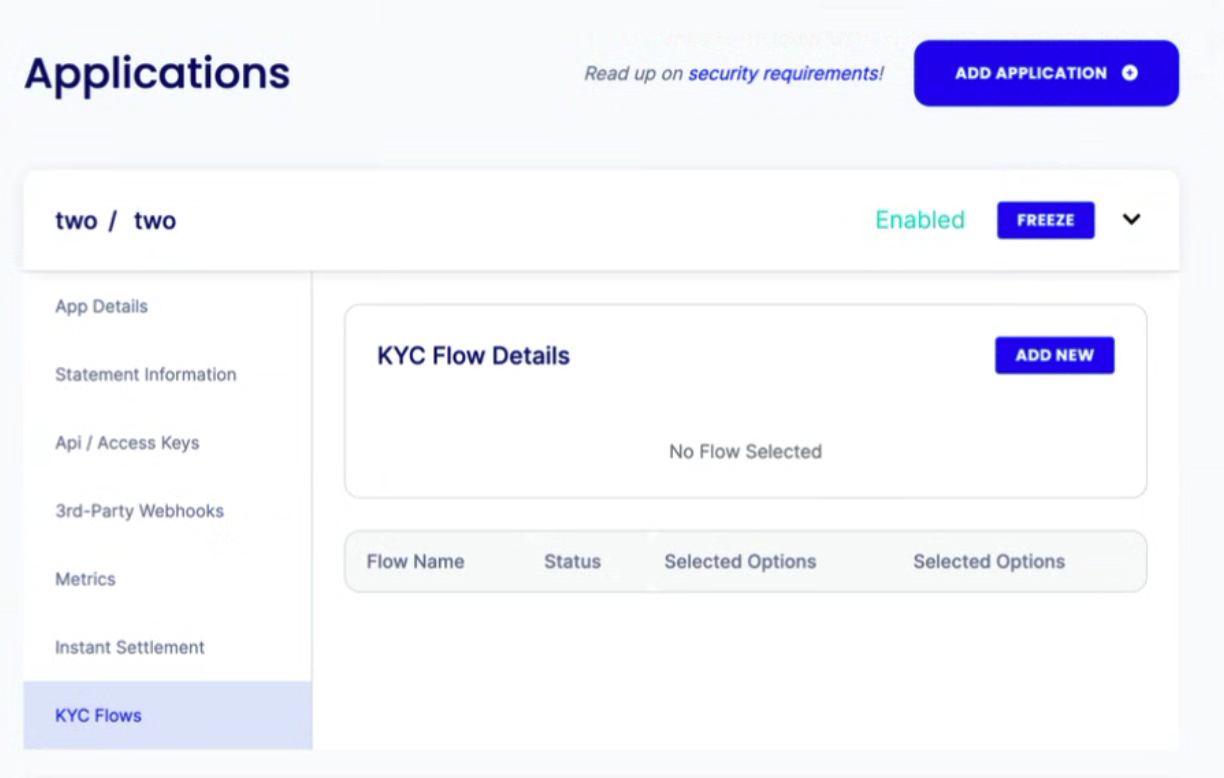
Navigate to the Applications tab
-
Find the app you want to create a KYC Flow for and click the KYC Flow tab
-
Click Add New
-
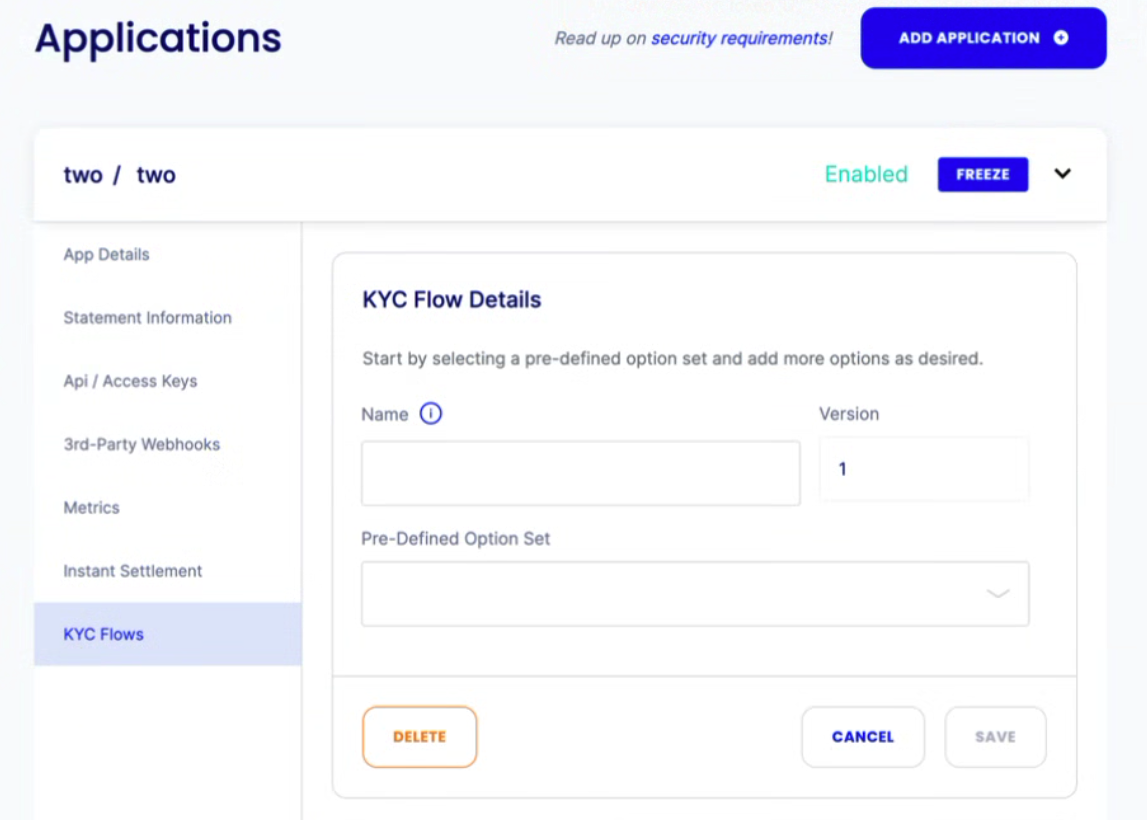
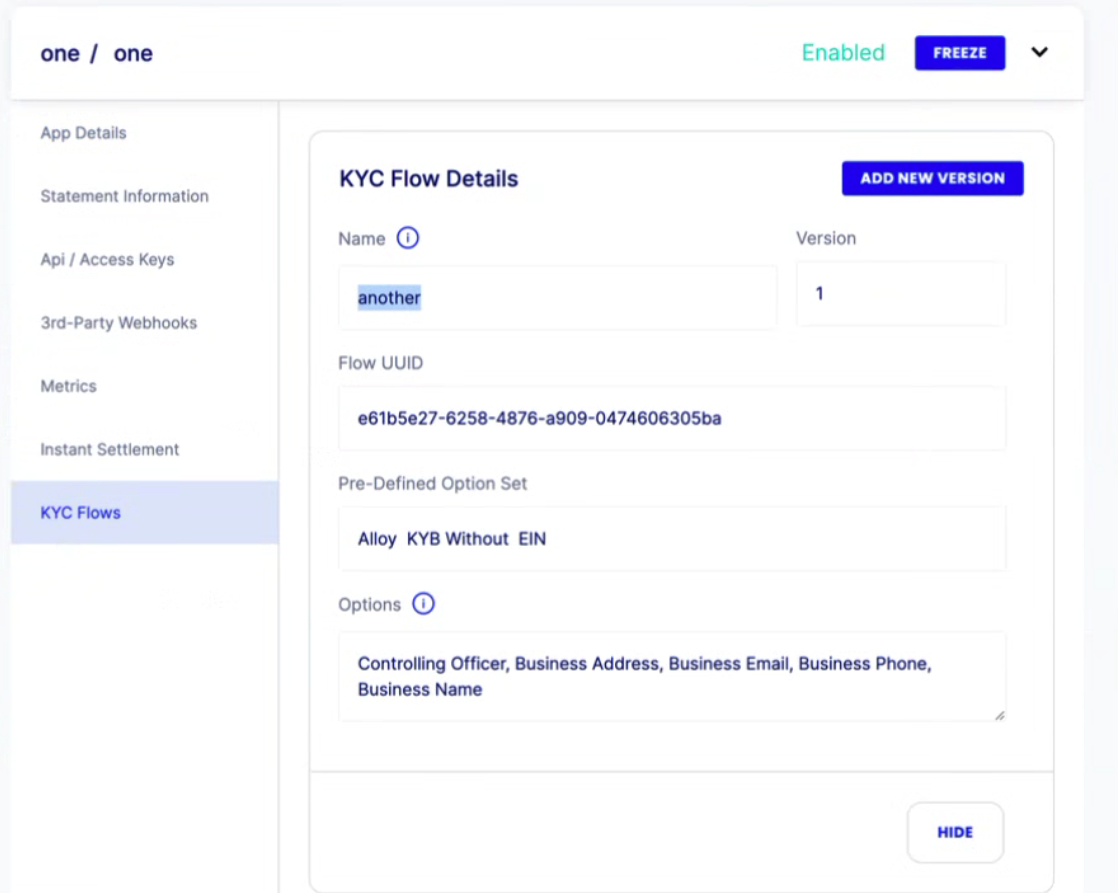
After clicking Add New, fill out the information and choose KYC options for your new Flow
- Name: Required. Give your KYC Flow a name
- Version: Pre-populated. Once your Flow has been approved, you have the option to create a new version of the Flow with different options.
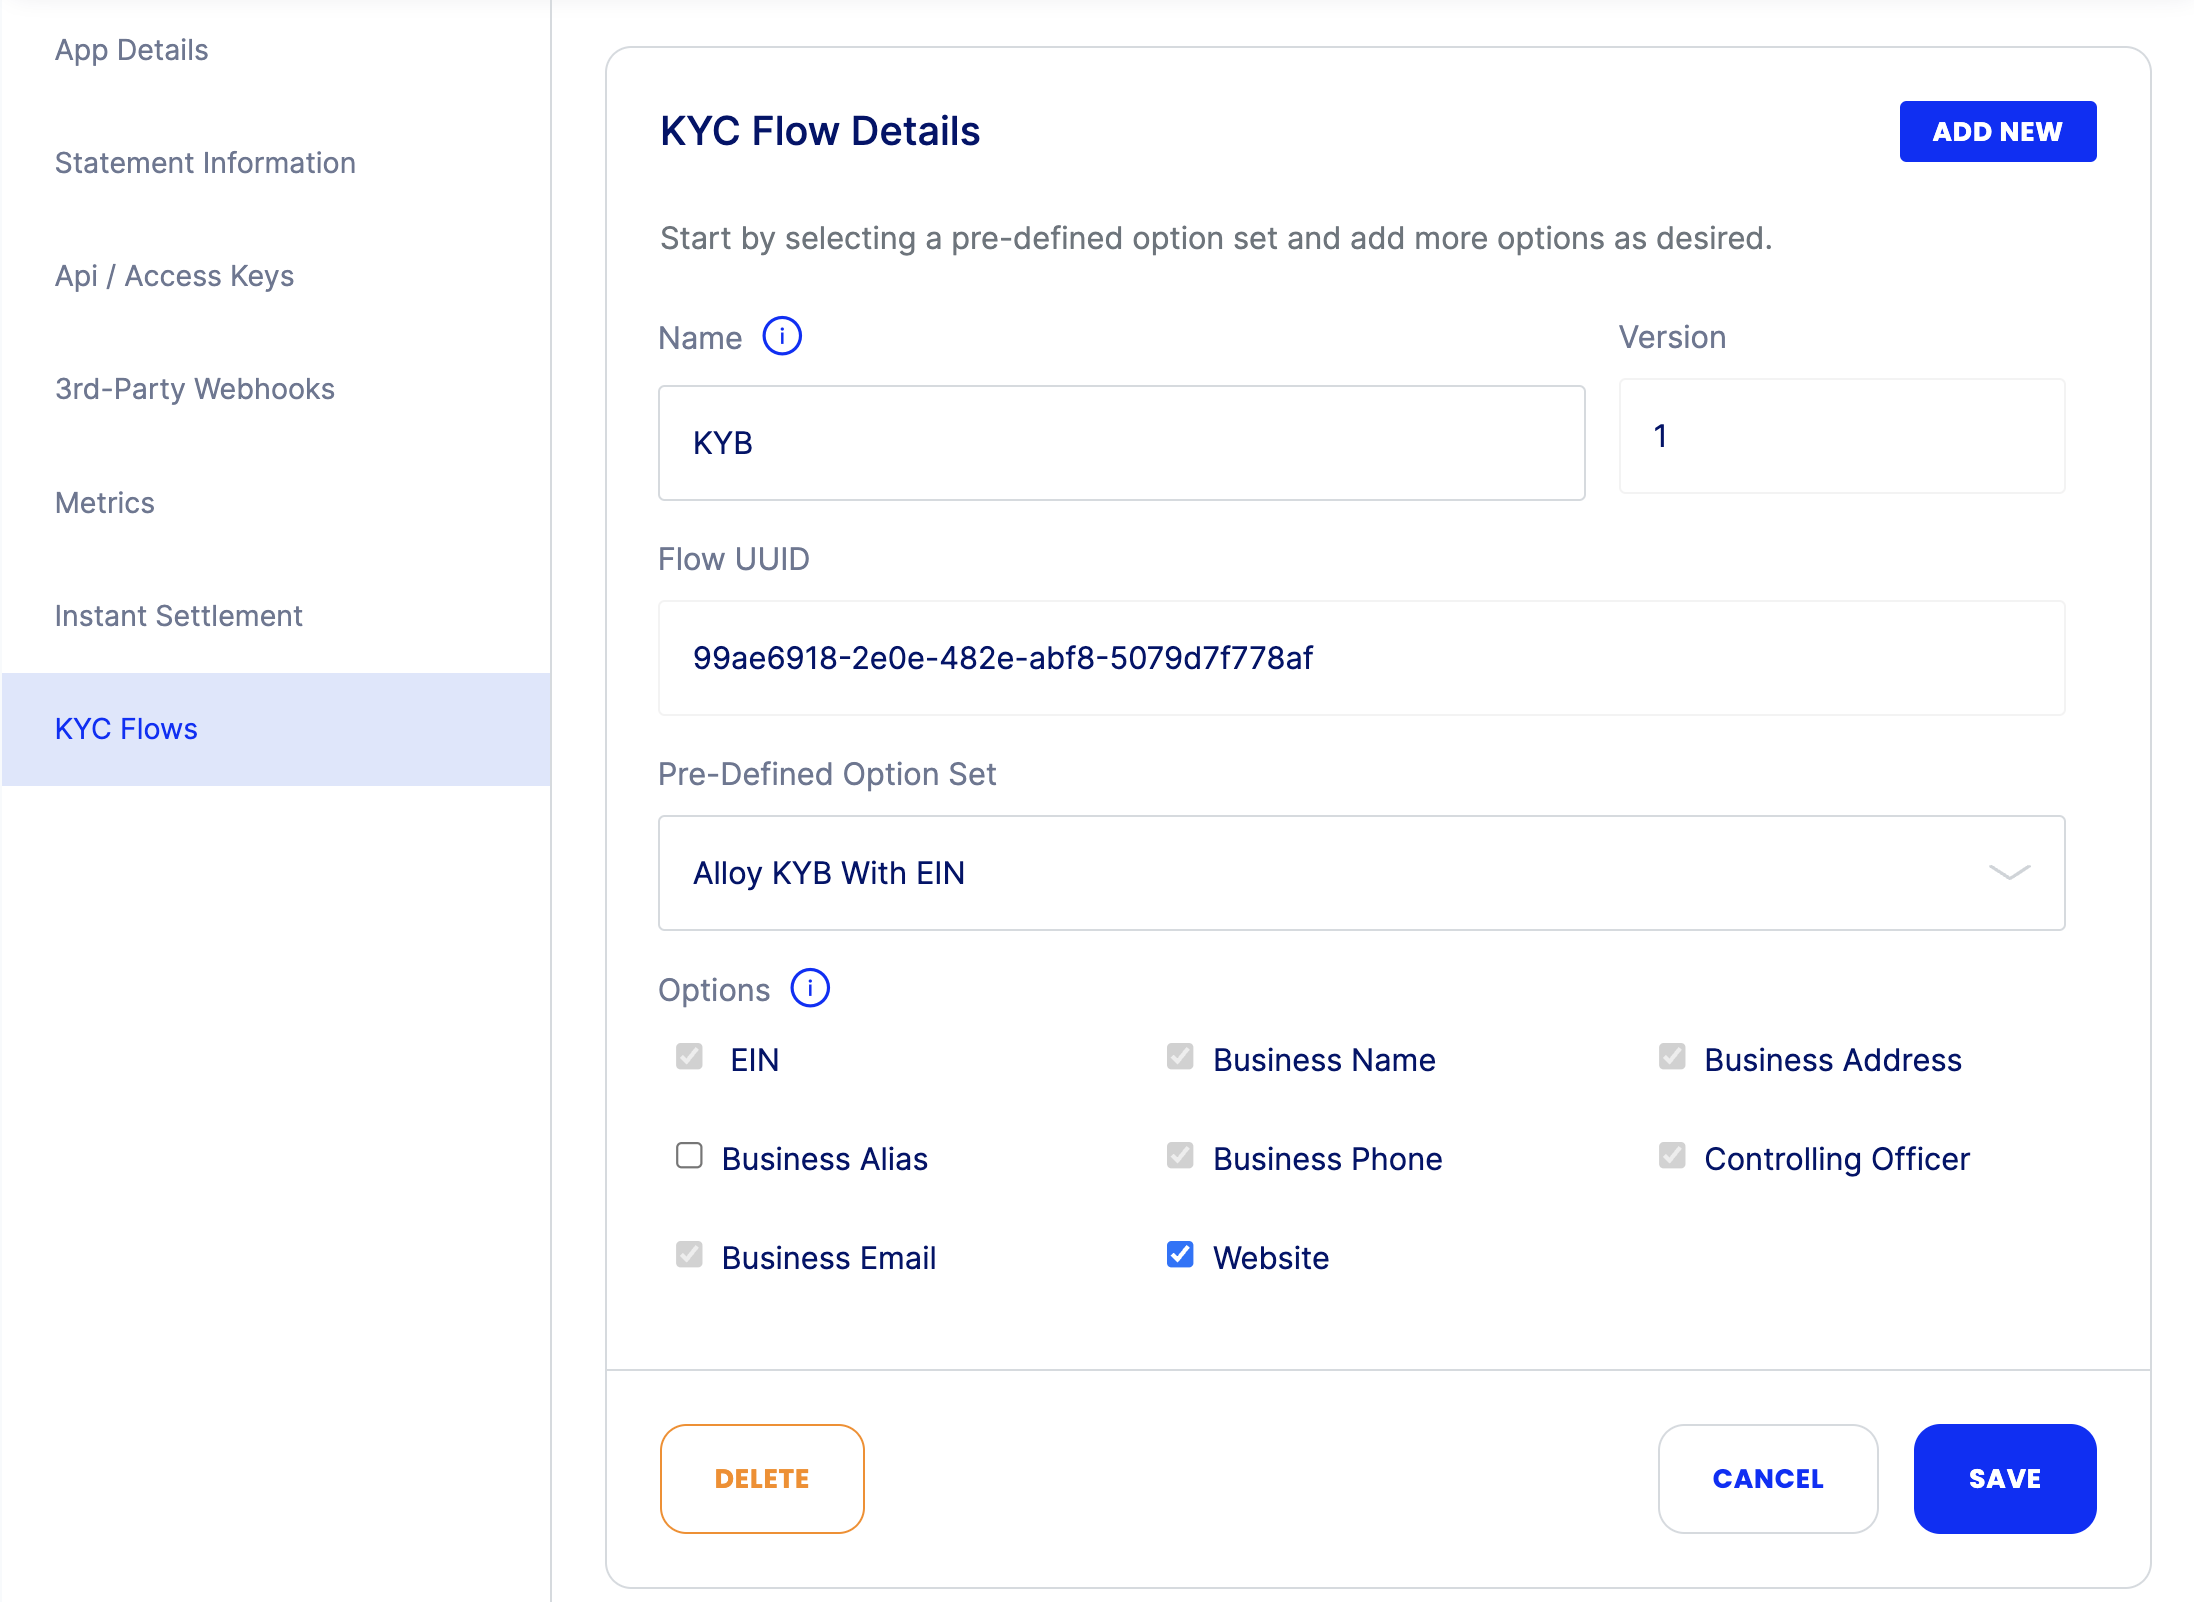
- Pre-Defined Option Set: Required. Make sure to choose a Priority option. Only use the KYB Without EIN option if you will have businesses without EINs. If a business has an EIN, that is the ID you are required to provide.
-
Once you've chosen a Pre-Defined Option Set, the Options section will appear. The pre-defined options are already selected, greyed out. These cannot be removed. Additional options can be added here if desired.
-
Save your KYC Flow
- NOTE: After you save your KYC Flow, you will see the Flow UUID populated.
Editing an Existing KYC Flow
When editing is allowed
Editing is only allowed before you submit a KYC Flow to our Compliance team for approval. Once submitted, editing is no longer allowed.
The only exception is when a Flow is denied by the Compliance team - the status will change to Denied and you can make edits, then resubmit for approval.
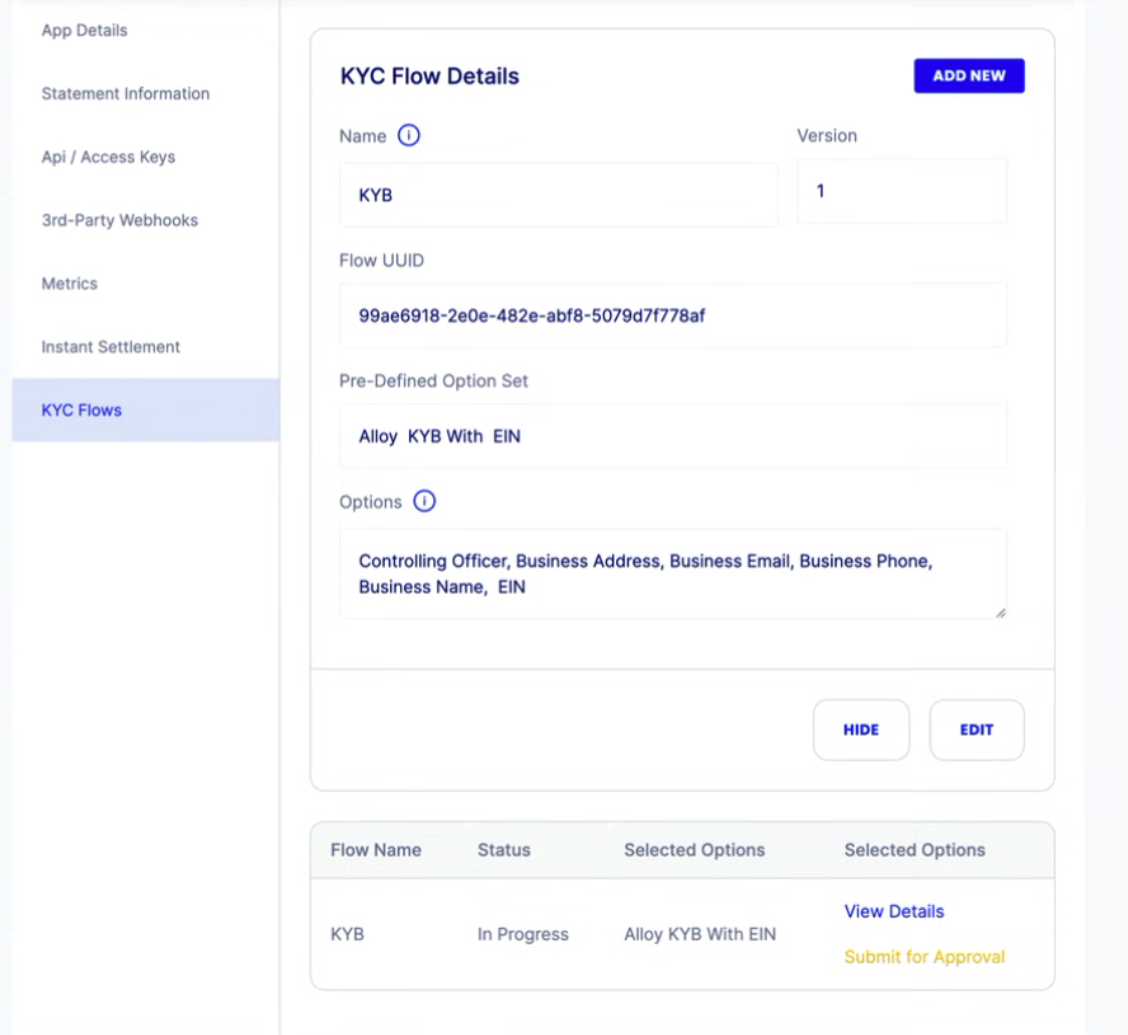
Once you have an existing Flow populating the list at the bottom of the KYC Flows tab, click "View Details" (far right) then "Edit"
Submitting a KYC Flow for Approval
Once you have an existing Flow populating the list at the bottom of the KYC Flows tab and you are ready for Sila's Compliance team to review it, click "Submit for Approval" (far right). The status will change to Pending Approval, and no further edits can be made to this Flow.
Sandbox Approval
In the Sandbox environment ONLY, approval is automatically granted once you click "Submit for Approval"
Creating a New Version
If you need to make changes to a KYC Flow after it's been approved, you can create a new version.
-
Click "View Details," then "Add New Version"
-
You CANNOT edit the Name or the Flow UUID. You CAN change the Pre-Defined Option Set and the Options.
-
Once your changes have been made, click "Save" and this will add a new In Process Flow to the list, with a different Flow UUID. Make further edits as needed, then submit for approval.
Switching from Classic KYC to Advanced KYC
Start with this section of this implementation guide if you are switching from Classic to Advanced KYC to review endpoint changes, then continue through the rest of the full guide.
If you do NOT have Classic built out, jump to this section.
Code Changes
Note that the below is an overview of changes to make. Please see the linked endpoint docs for more specifics on requirements, requests, and responses.
Existing Endpoints
- New required
verification_uuidfield in request. The ID of the verification record the document is for must be provided. - New
providerfield in the request. Optional. Default isPRIORITY(only valid option, currently). - New
is_frontfield in the request. This is a boolean to designate the front and back of the document being uploaded. Default istrue, so only required to set tofalsefor the back of documents.
New Endpoints
- The endpoint you'll use to kick off the KYC verification process after registering a new end user instead of /request_kyc.
- Supply a verification UUID to return the full verification record. Use instead of /check_kyc.
- Returns the full list of verification records for a single user_handle. Use instead of /check_kyc.
Do not poll /get_verifications or /get_verifications/<verification_uuid>
Just like how we advise against polling /check_kyc and using webhooks instead, please use our webooks instead of polling these endpoints.
Sila reserves the right to impose rate limits if deemed necessary.
Endpoints No Longer Needed
/request_kyc
- Use /kyc.
/check_kyc
- Use /get_verifications/<verification_uuid> or /get_verifications instead.
Webhooks
- The KYC Status Event webhook will not fire with Advanced KYC. Please see the webhooks section below.
Updated 5 months ago