Register Your Application
Create Sandbox and Production apps in the Sila console.
One Production App Only
In Sandbox, please feel free to create multiple testing apps. In Production, we enforce only ONE app. If you have a need for more than one, please reach out to your sales rep to discuss.
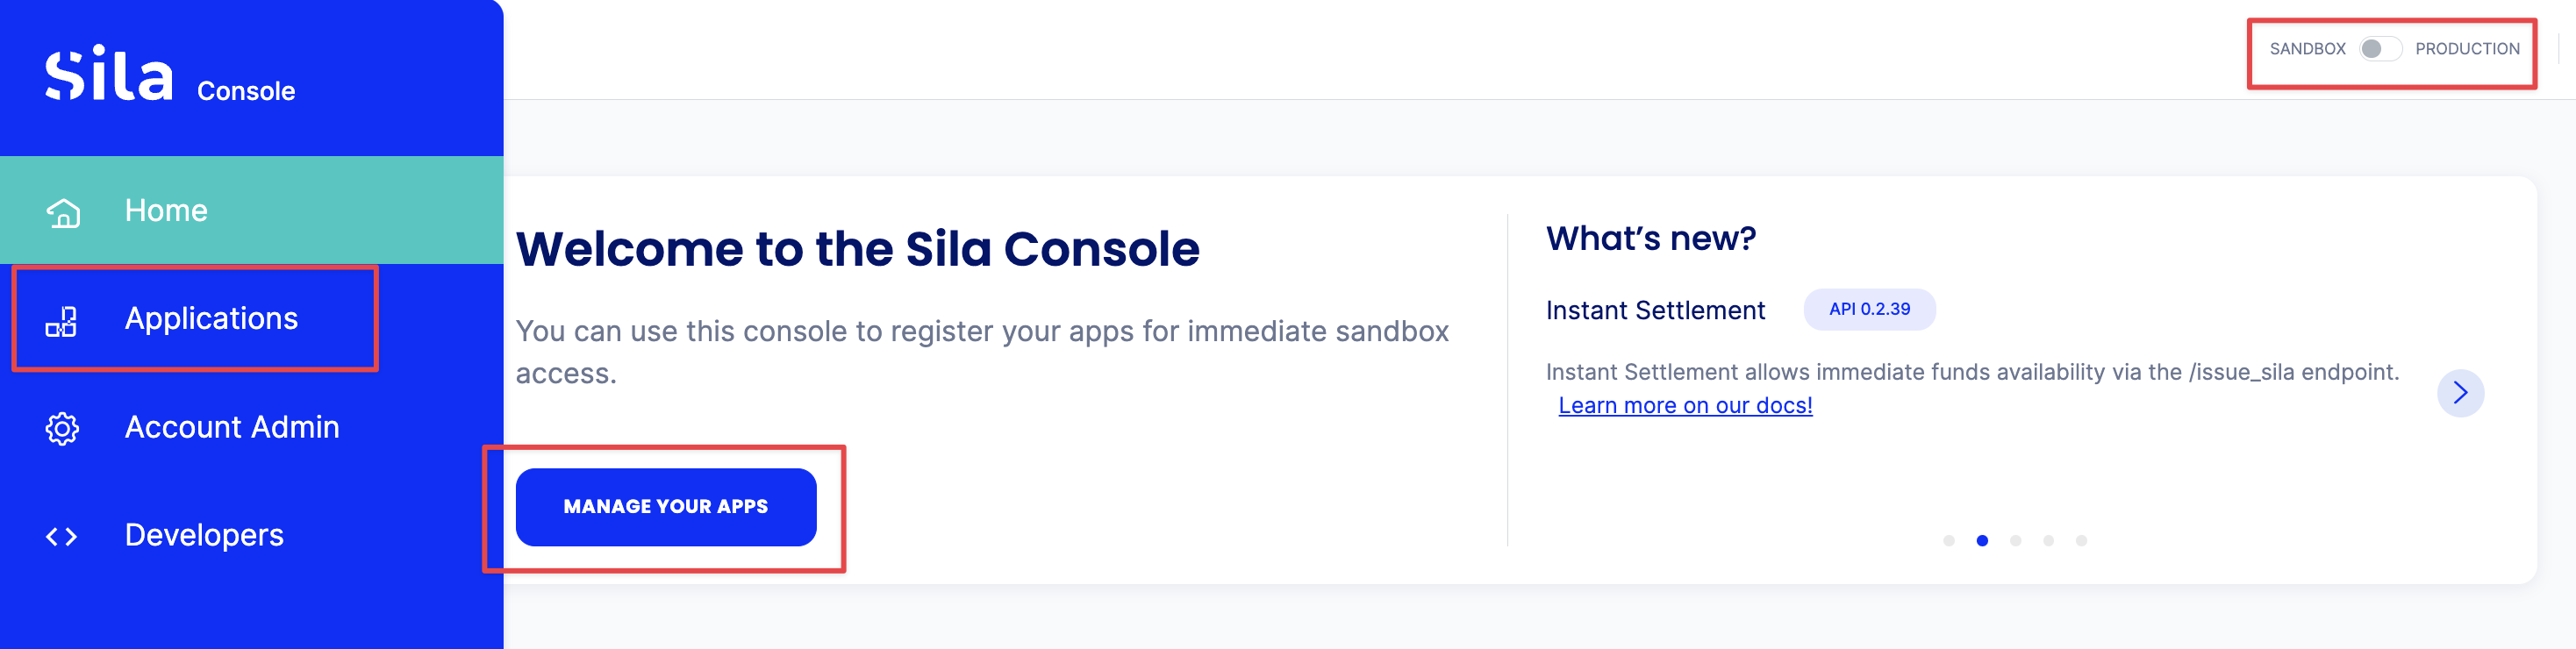
Step 1: From the welcome page, first make sure that you are toggled to the environment you want to create an app in, then you can either click "Applications" from the left-hand nav bar, or the "Manage your Apps" button.
Step 2: Click "Add Application"

Step 3: Create two app names - internal and public (they do not have to be the same).
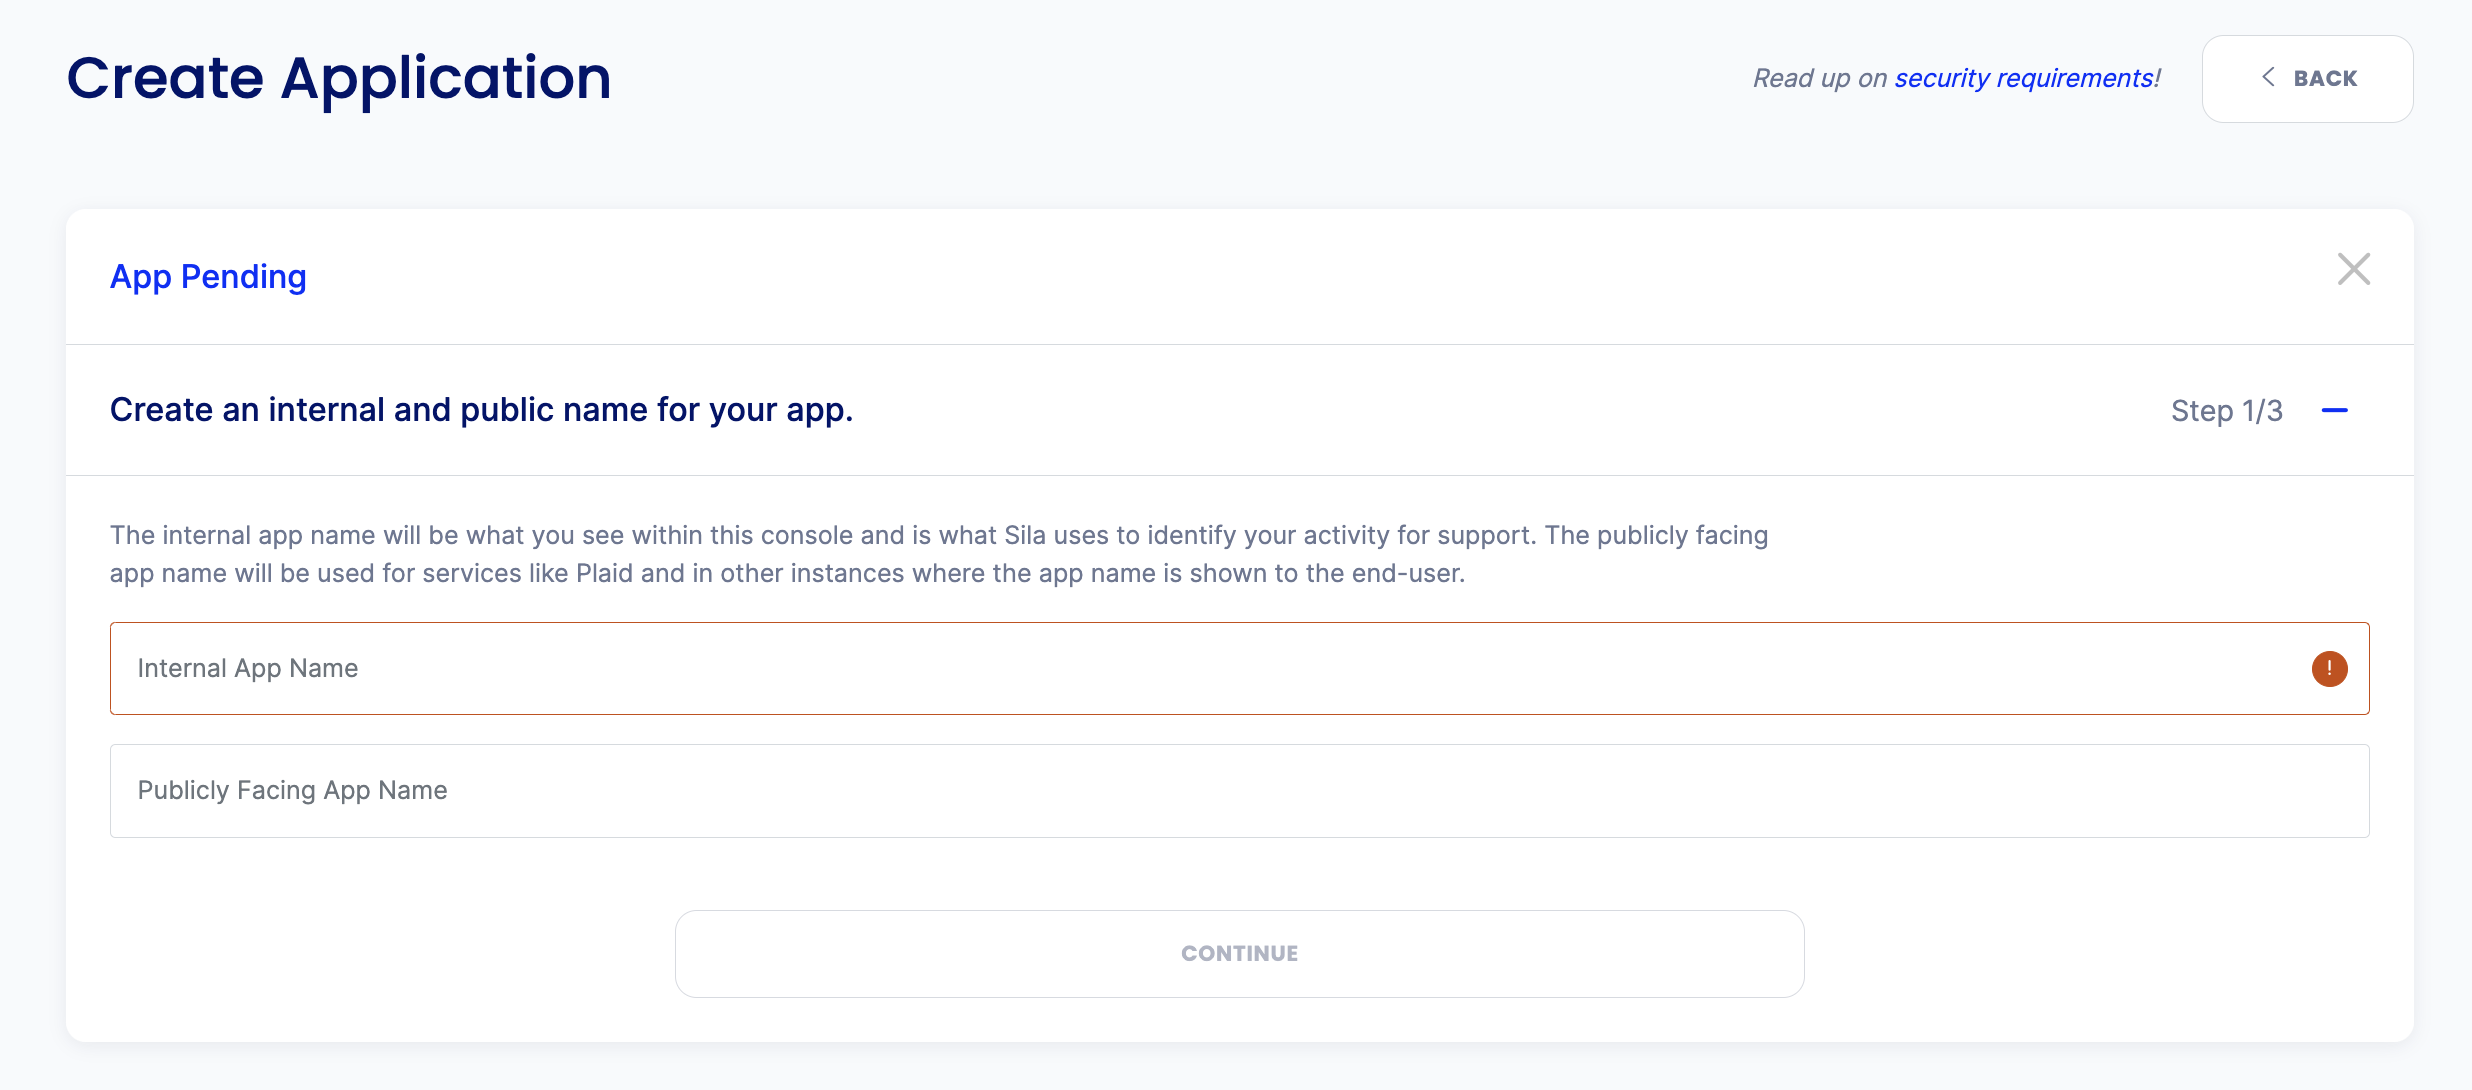
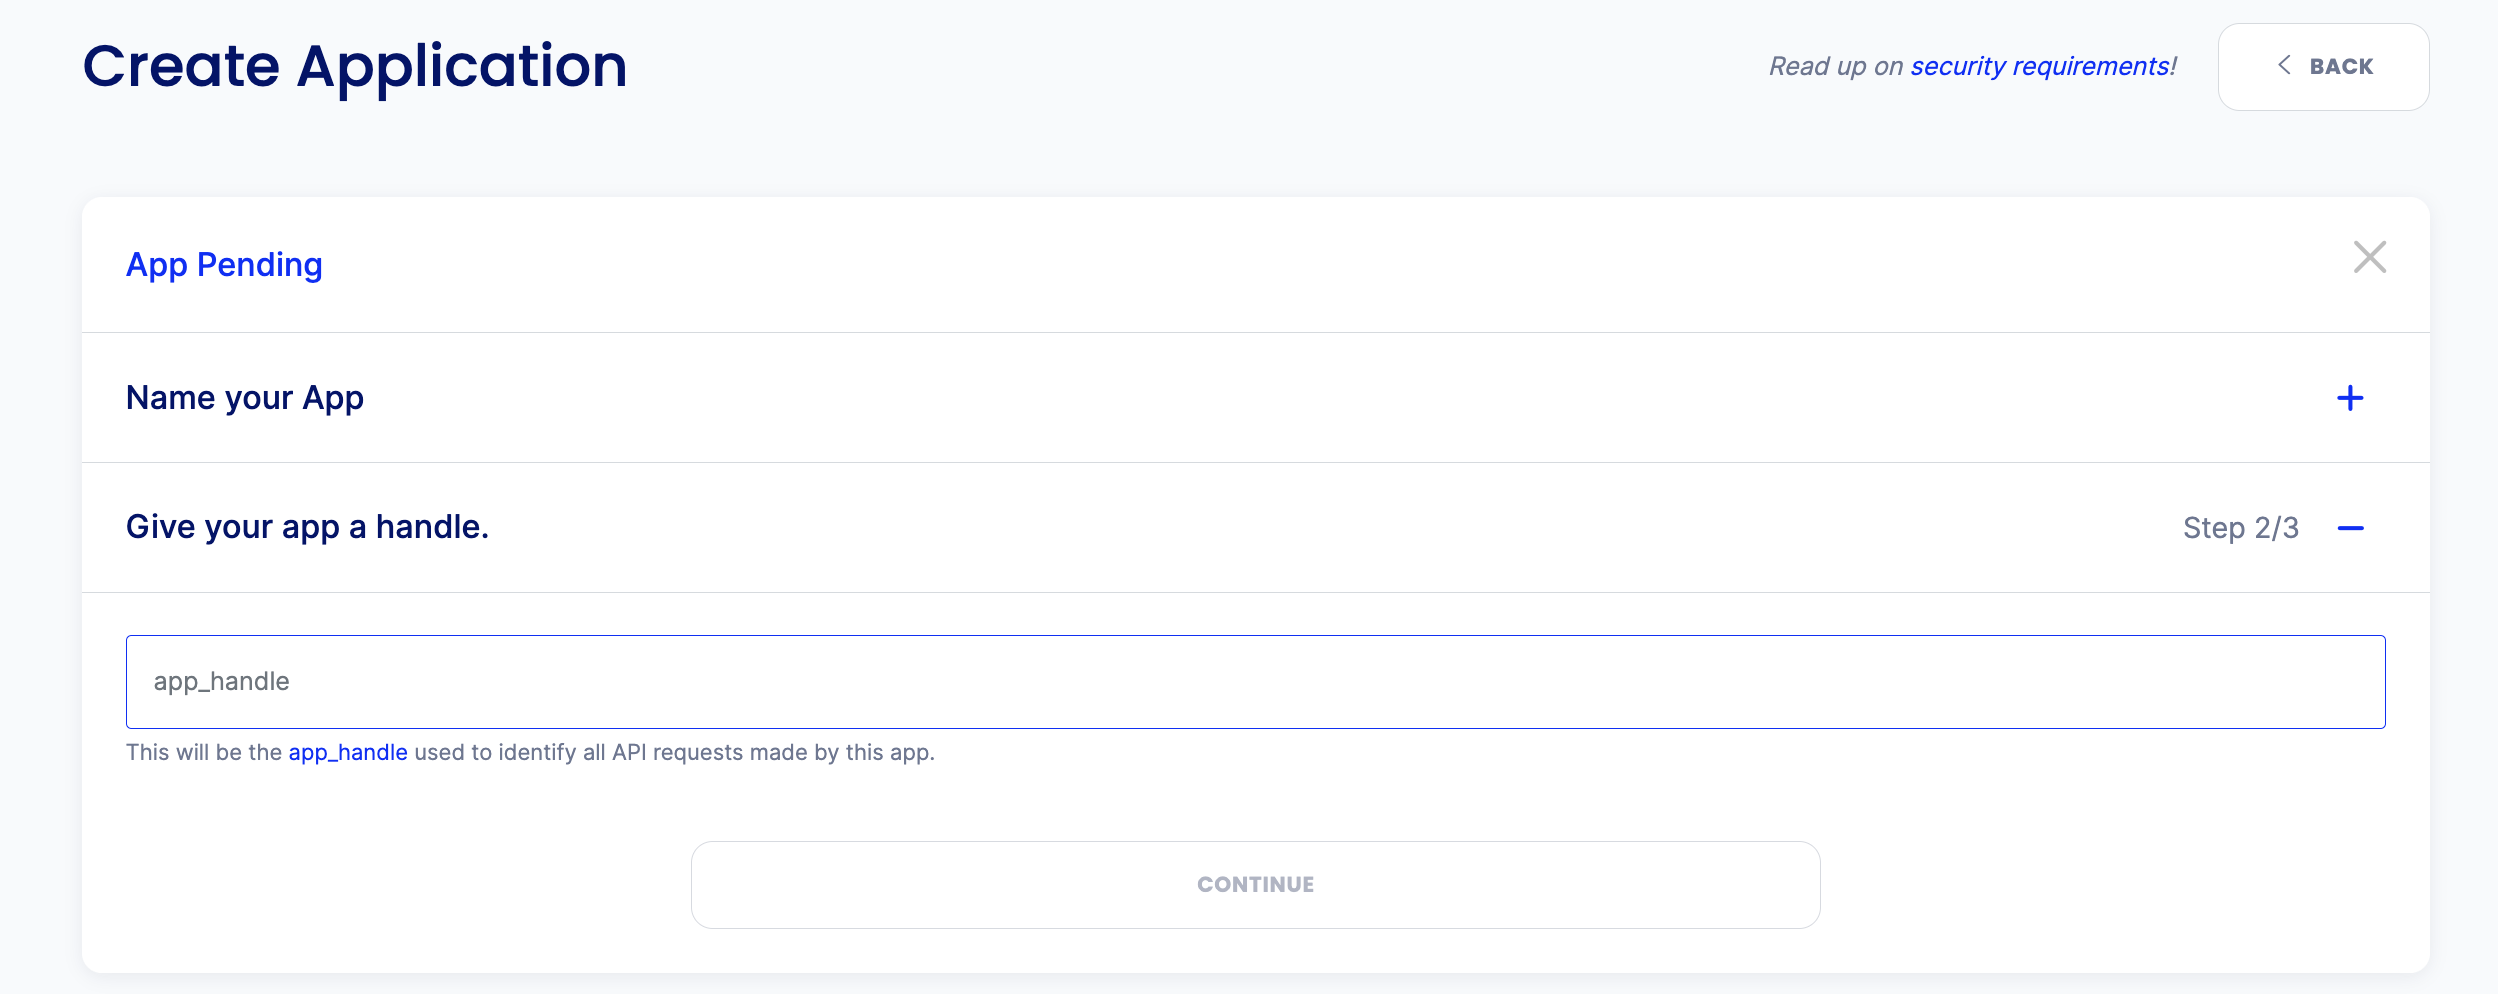
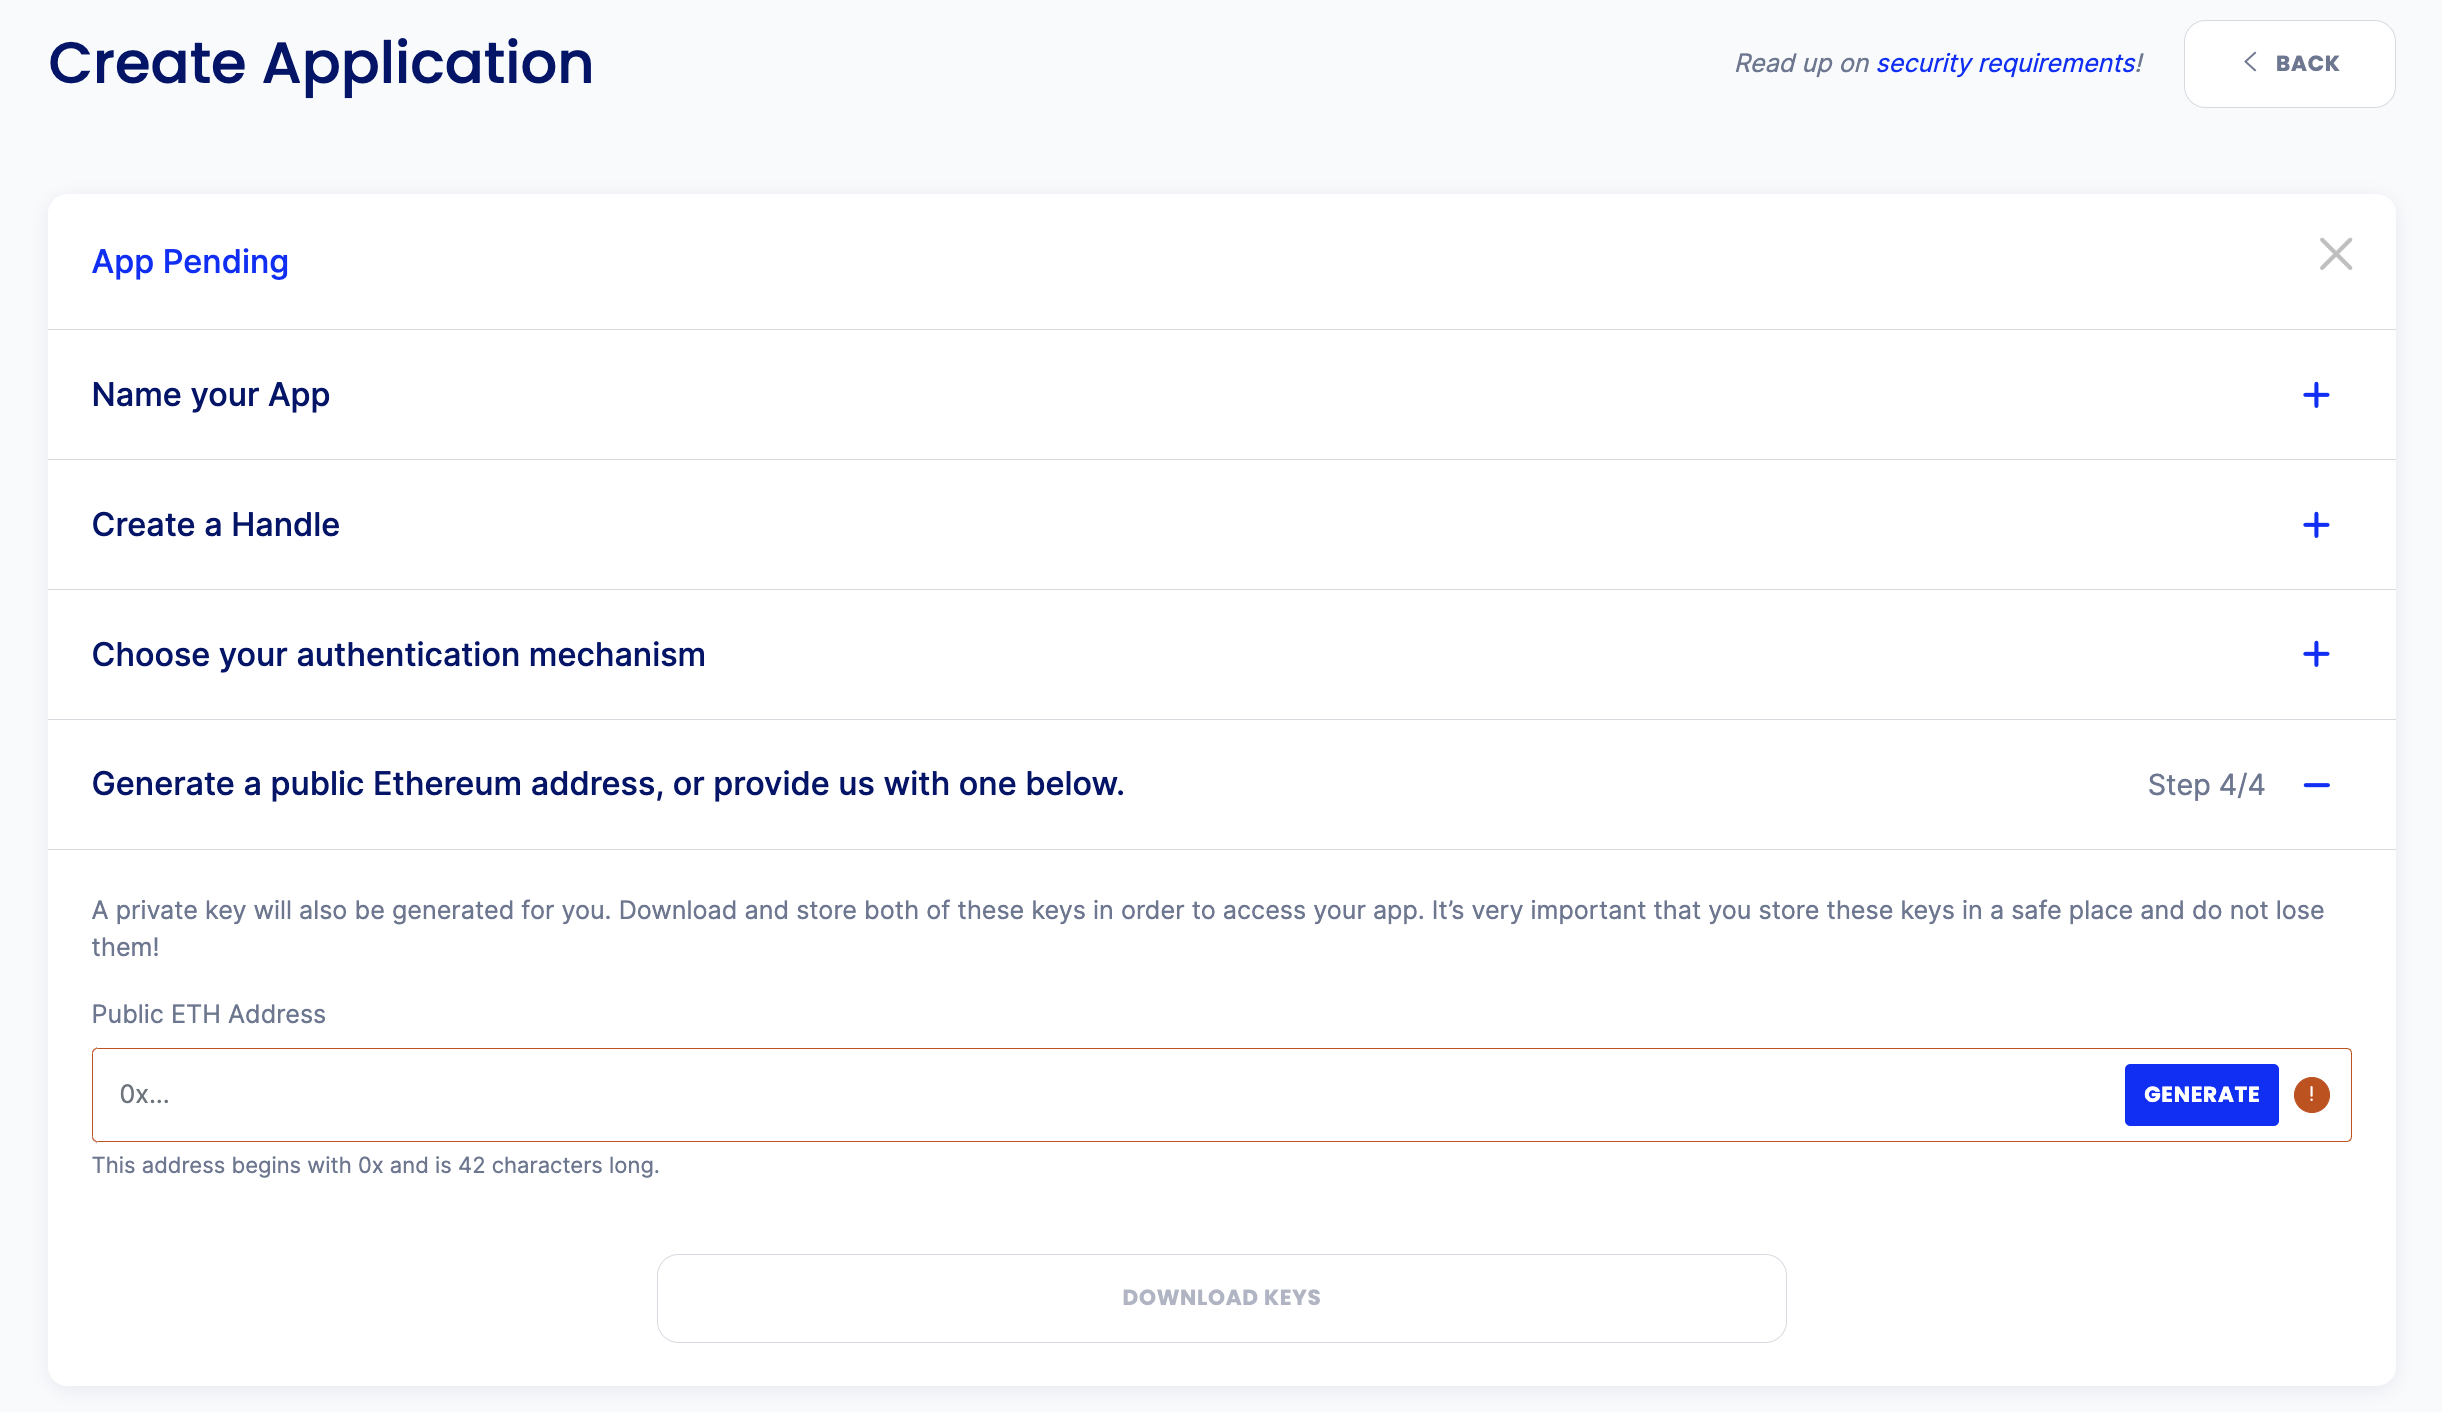
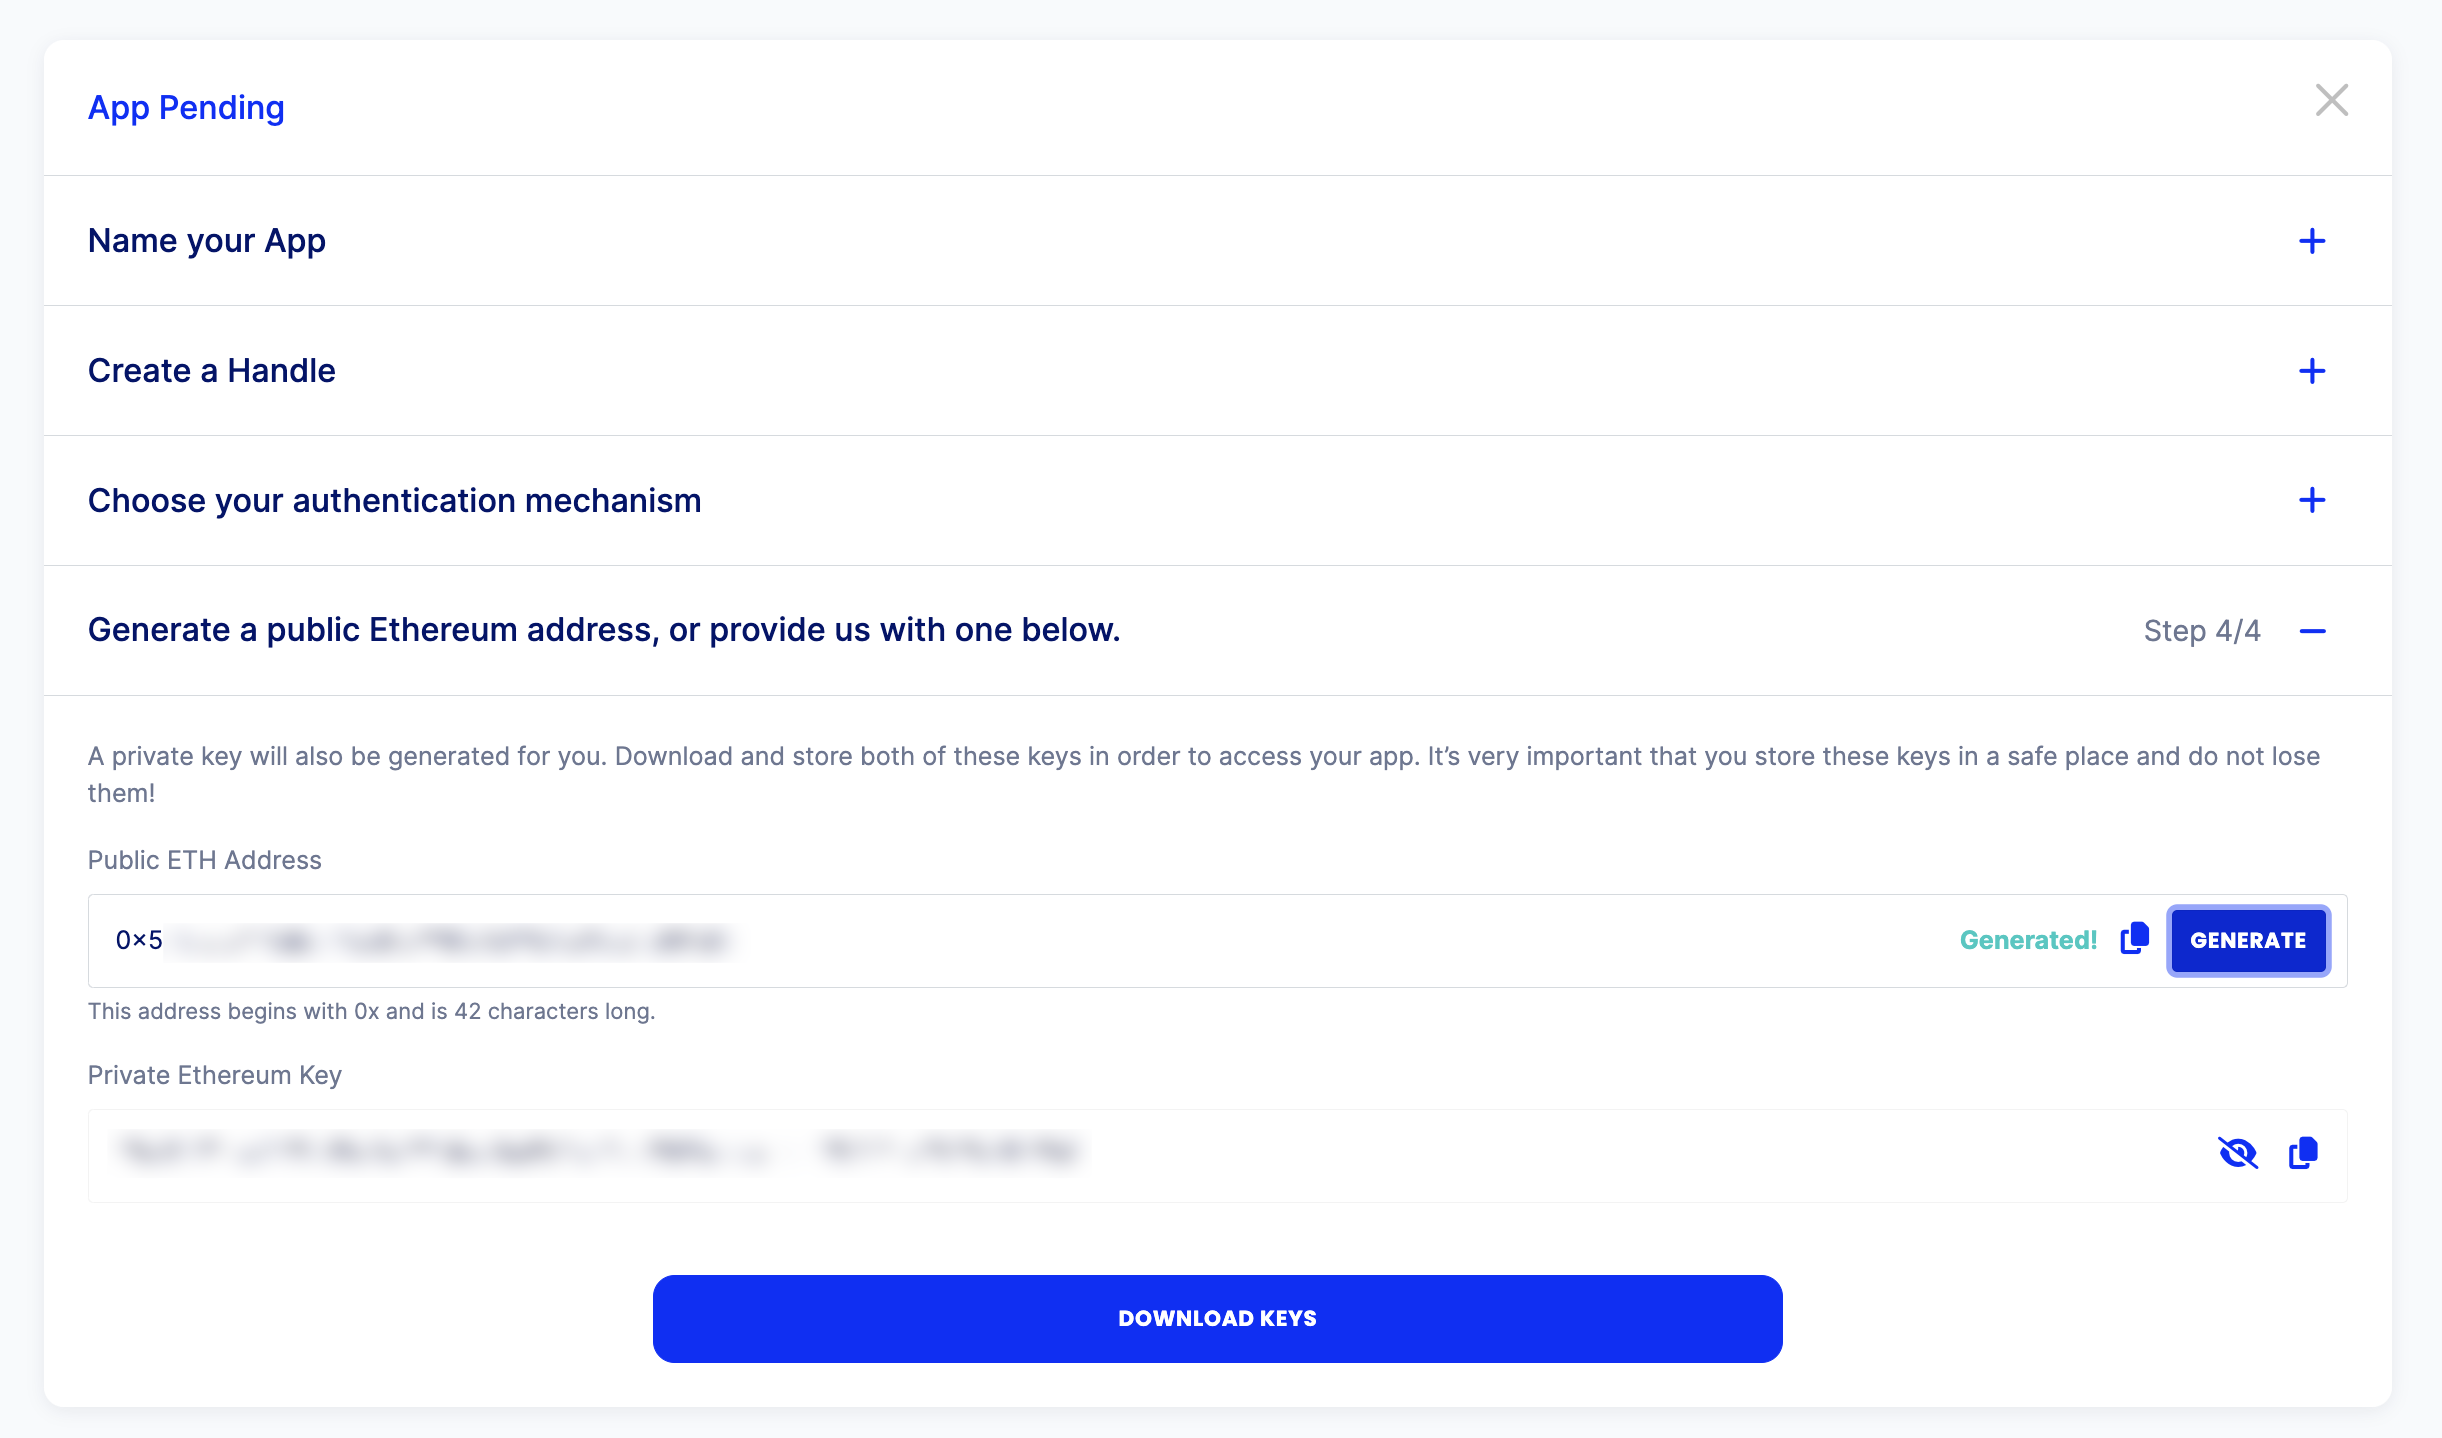
Step 4:. Create a handle for your app.
App Handle Naming
- We recommend a naming convention like companyName-environment (eg: customerName-sandbox or customerName-production)
- ALLOWED CHARACTERS:
- a-z
- A-Z
- Numbers
- Hyphen (-)
- Underscore (_)
You will receive errors if you include a character outside the limits outlined here.
Step 5: Pick an auth method for your app.
NOTE: It is highly recommend you go with the access token (JWT) method rather than ECDSA. It is easier to use, and in the very long term Sila plans to deprecate ECDSA in favor of the JWT method. (There is no current ETA for this deprecation.)
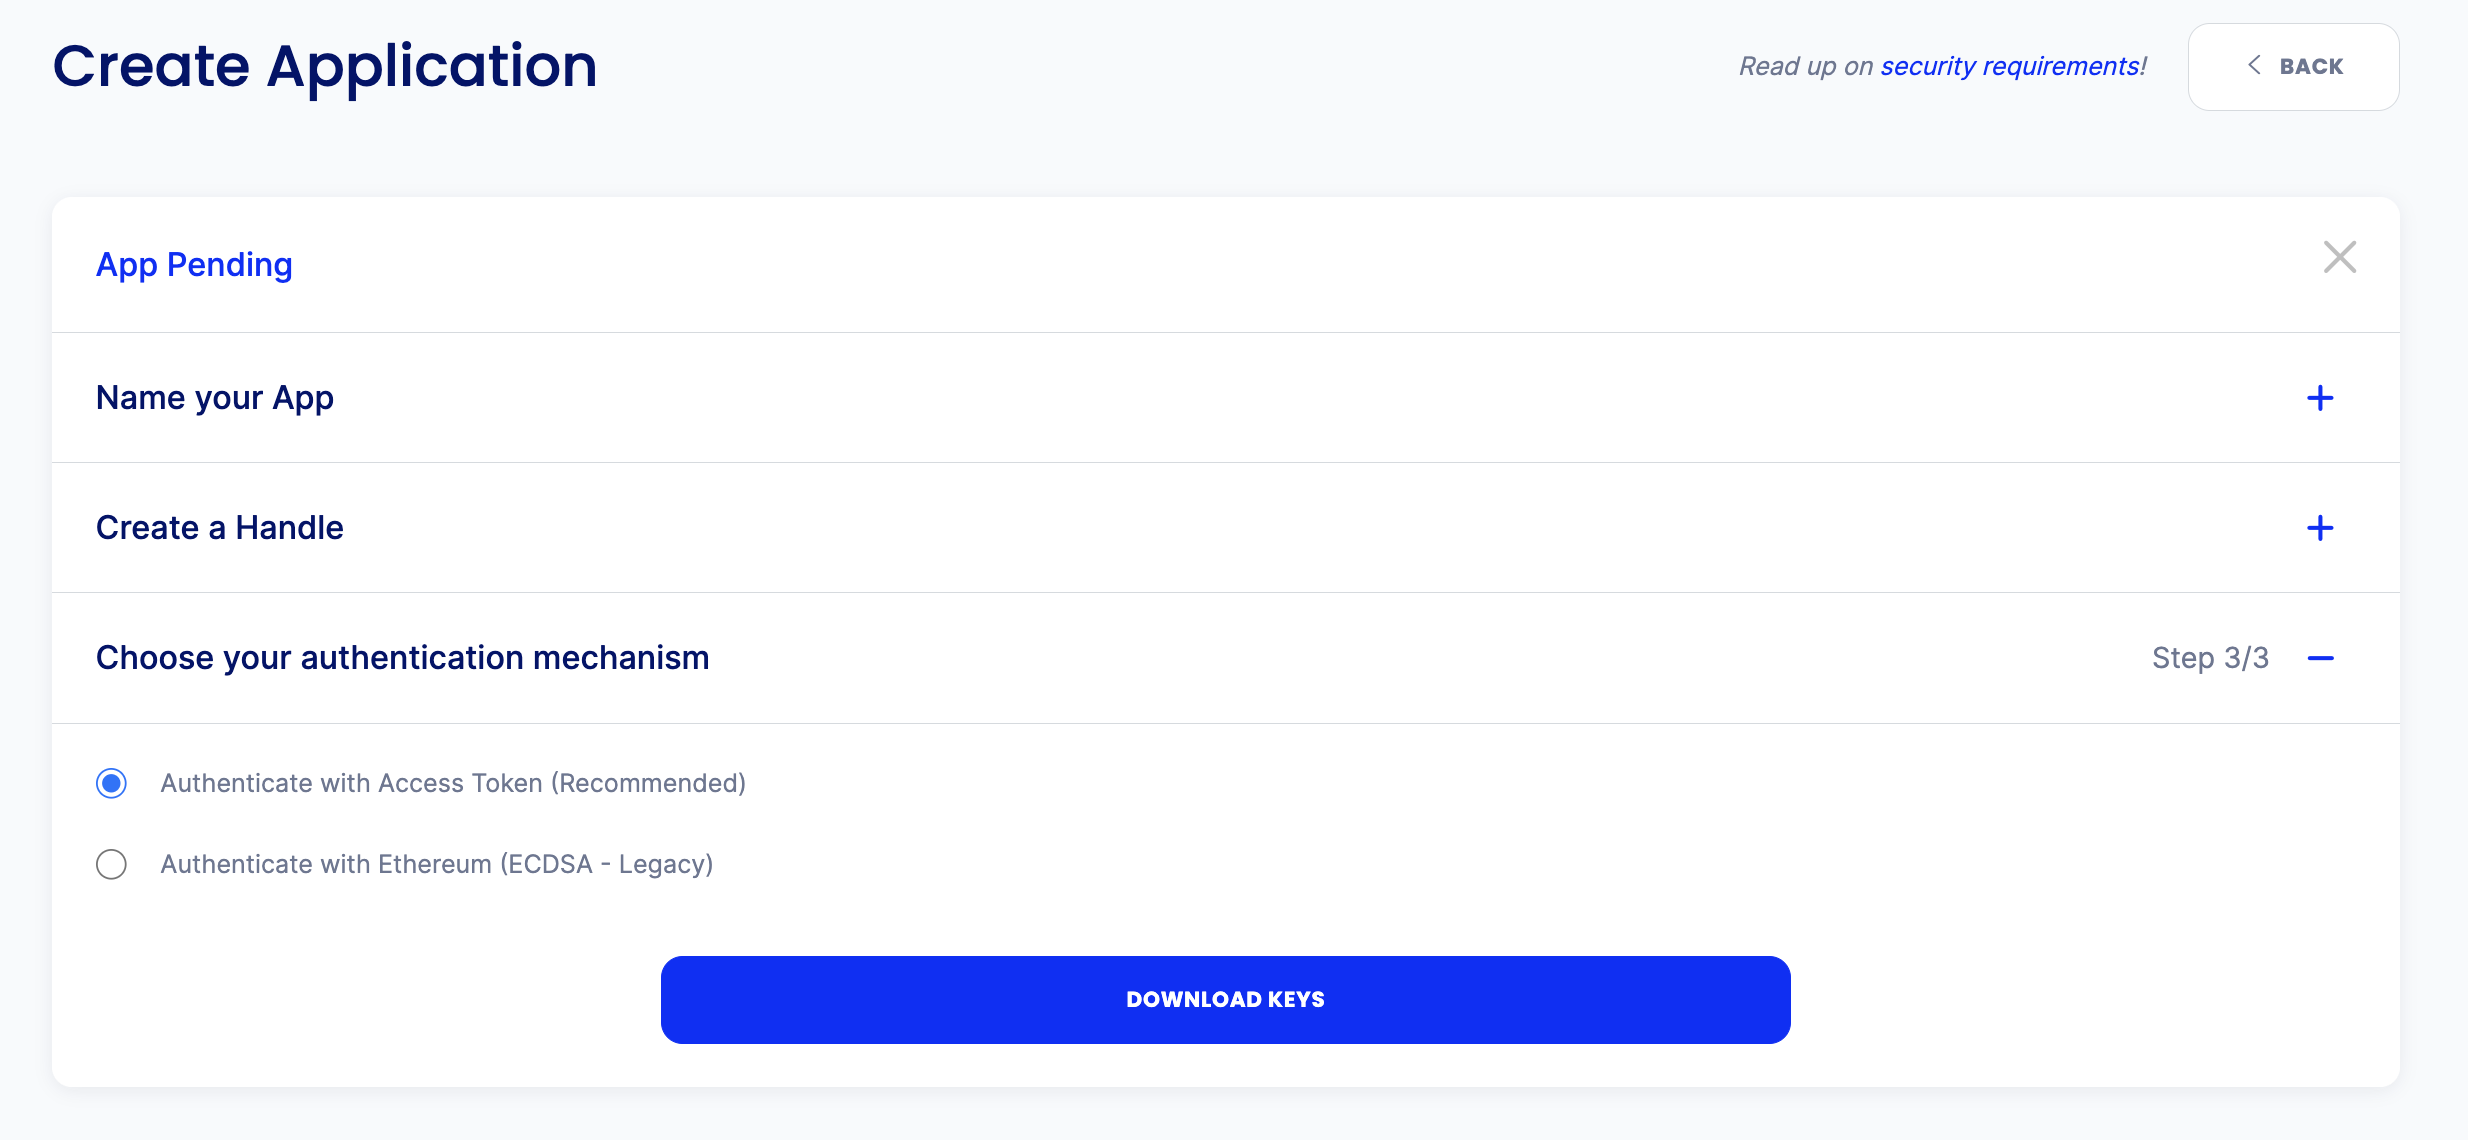
If you pick JWT, go ahead and download the keys from here.
Remember to save your client secret.
You will need your Client Secret and app_handle to communicate with the Sila API.
If you pick ECDSA, click the "Generate" button to generate a public ETH address, which will also generate your private Ethereum key.
Remember to save your private key.
You will need your Private Key and app_handle to communicate with the Sila API. In production you will be required to store your private key in a KMS..
Once you've saved your changes you'll see that your app status is now "Enabled" on the Sila network and you're ready to start coding.
Updated over 1 year ago